Oracle Discoverer is a business intelligence tool to support organizational decisions and data will show in the form of excel format.
Components of discoverer:-
1.Discoverer Administration Edition
2. Discoverer Desktop Edition
Architecture Of Discoverer Administartion Edition:-
i.End User Layer
ii.Business Area
iii.Business Folder
Overview of Business Areas:-
-A business area is a collection of related information in the database.
-A business area is a set of related information with a common business purpose
-For example, information about Sales may be stored in one business area, whilinformation about Cops is stored in another business area-In simple words it can be termed as collections of objects in a particular module
Overview of Business Folders:-
-Simple Folders – Folders that are based on a database table (e.g.: ITEM)
-Custom Folders – Folders that contain a custom SQL query.
-Complex Folders – Folders that are based on multiple simple folders.
Here are the steps for creating the ‘Business area’
Open Discoverer Administrative Edition
Logon to Discoverer Administrative Edition using SYSADMIN user

Click Connect

Choose a Responsibility and Click OK


Click Create a New Business Area and Click Next

Select Any User and Click Next

Expand the Node and Select Any Table or View And Click Next

Click Next

Name the Business Area and Description Appropriately And Click Finish the Business Area Will be created and you would view the following screen

Close the Administrative Tasklist Window and Expand the Business Area

Delete The Folder under the Business Area

Click Yes

Now the business Area is Empty
Logon to SQL Plus and Create a View according to the requirement.
Relogon to Discoverer Administration Edition to have the Schema Refreshed And Open the Business Area Created Earlier.
Right Click on the Business Area Created and Select the New Folder from Database Option


Click Next

Select the Schema APPS and Click Next as shown below


Expand the APPS Schema

Select the View Created at SQL Plus and Click Next

Click Finish
The Folder is Created
Expand the Business Area and you can view the Folder
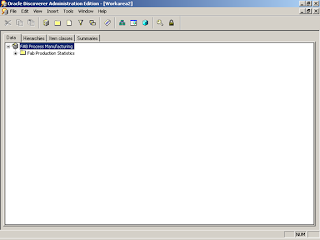
Click Tools à Security Menu

Assign the Users/Responsibilities who can access the Business Area and Click OK
Here are the screen shots for creating the workbooks in the Discoverer Desktop:-
Logon to the Discoverer Desktop Edition to create Work Books

Login as SYSADMIN User

Select System Administrator Responsibility and Click Ok


Select Create a new workbook option

Select one of the Display Style as per the requirement and Click Next

Select the Business Area and the folder on which you would like to create the Workbook and Click Next
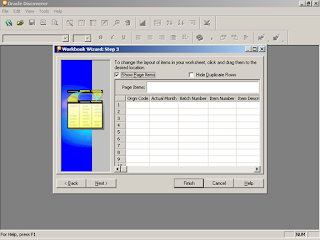
Check Show Page Items and Click Next

You could add the condition required by clicking New.


Select New Parameter Option from the List You will get the following screen


Enter the Name, Prompt, Description and other Fields and Click OK

Click Ok

Click Next

You can create the Sort Condition so that the Workbook would sort the data accordingly.
Click Add

Select the Field on which you would like to sort the data and Click ok
Add as many sorts you need

Click Finish
You workbook is Created.

Go to File- Manage- wokbooks Properties

Give the Identifier and Description

Click Ok

Click Yes
Go to Sheet à Rename Sheet Menu

Give an Appropriate Name and Click ok

Click Save

Select Database


Give an appropriate name and Click Save
Goto File - Manageworkbooks- sharing menu
Select the Workbook and assign it to the responsibility who can access the workbooks as shown in the screen

Click Ok.
Challa.


